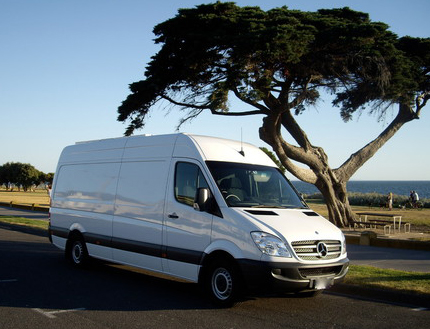
“Stealth” Sprinter conversions, meaning Sprinter RV conversions that seem like a plain Jane delivery van from the outside, are great if you want to do a lot of in-city camping, or just keep a lower profile. Trying to conceal your Sprinter conversion’s RV equipment presents some interesting challenges, especially:
- Allowing in sufficient light, but not having too many obvious windows
- Having a complete “blackout” system, so interior light isn’t visible from outside
- Concealing vents and panels for refrigerators, propane tanks, stoves, etc.
Mark Ramsbottom and his partner built a beautiful stealth DIY Sprinter RV conversion from a 2010 MB Sprinter 316 CDI, what we in the States call a Sprinter 2500 cargo van on a 170″ wheelbase. Their van has lots of interior lights, an electric bed that lowers from the ceiling, and a cozy apartment feel, very different from most DIY or commercial conversions. And I share their simple design philosophy of powering everything just with solar and diesel:
“We use 2x 150 Ah AGM batteries… We also put 475 watts of solar on the roof to keep them charged up, using a Morningstar Tristar 45 PWM controller. We run a 12-volt DC 140- liter fridge, lights, TV, bed hoist, phone/computer chargers, a toaster, microwave, coffee machine, ceiling fan, media centre and PlayStation from the batteries. We have a couple of inverters (380-watt pure sine wave, and 1200-watt modified sine wave). It is all monitored using a Trimetric 2025 battery monitor.”
With their conversion completed, they left Melbourne in Feb 2012, heading out on the trip of a lifetime, length unknown: “We chose to do the build and travel now because life’s too short. We both had jobs we were becoming less keen on, and we needed a break. We both owned a house, so we both sold (more or less at the top of our housing bubble), and are living on the interest generated by the proceeds. If we ever become sick of travelling, we will still have the money to buy back in (at the bottom of the impending crash hopefully!!). It was a bit scary doing it, but we haven’t looked back. No ties, no bills, no time constraints, no one to answer to.”
I caught up with Mark to ask him some questions about his well-done DIY Sprinter conversion.
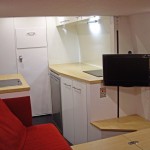
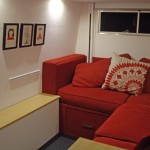
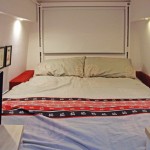
What were your major design goals? “Major design goals were to maximize livability as we are living in the van full-time. We wanted a lounge area that was big enough for both of us to comfortably lie fully extended on our own couch, to assist with long periods of potentially being inside during poor weather. We wanted a kitchen that was usable with bench space, and a bed that had a decent mattress that didn’t need making each day. Power wise, we didn’t want to plug into power, use a generator, or carry gas. Solar/diesel only – fill up the tank and it’s all done, without forgoing TV, computers, Playstation, movies, coffee maker, etc.”
Did you end up doing several designs, or just one? “We did several designs, largely in my head. We decided to forgo a separate shower/toilet room as it would take too much space, add too much weight in water, and would only be used for minutes a day. The open plan feel to our van was important to us. in the end, there was only three areas to design – kitchen, lounge, bedroom. Lots of insulation, so no heating/cooling so far, although that may change down the track.”
About how long did the conversion take you to design and build, and roughly how much did it cost? “Our conversion took about 4 months full-time to complete. A lot longer than we originally thought. There are thousands of ‘things to do next’ and it is a really strange feeling to finish. We used what are hopefully quality parts, so our cost was quite high; probably about $20,000 plus the van purchase.”
What are the features of the design that you feel turned out the best? “Pretty much the whole project turned out how we wanted. The van powers itself. We don’t switch stuff on and off, it just works. The space is how we envisaged it would be. I can honestly say we’ve not once felt claustrophobic. My favorite part is the finish. There are flaws in it, but I love the apartment feel, rather than a ‘world of wood’ finish. For a first-time build, I’m happy, especially as I only have handyman level skills.”
Are there any things you wish you’d done differently? “One thing I’d do differently is to screw a backing strip of timber behind the total length of the joins in the plywood wall/ceiling linings, rather than just every now and then. After a few dirt roads, the joins become visible through the wallpaper and it annoys me! Might have to get thicker wallpaper.”
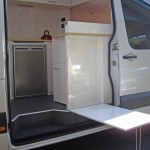
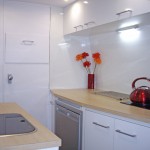
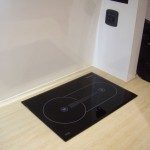
Gallery – Mark’s Stealth Sprinter Conversion
 |
 |
 |
 |
 |
 |
For lots more details and photographs, see Mark’s www.stealthsprinter.com Web site.
ASKING YOUR FEEDBACK: Are you looking to do a “stealth” Sprinter conversion? If so, what features will make it a “stealth” conversion for you?


Comments on this entry are closed.