Ron and Jill Tanner are the Houselove team: their project of renovating a circa-1897 Baltimore row house turned from a hobby almost into a vocation, as Ron’s blog (and new book) have turned the Houselove couple into a fixture among the reno-obsessed.
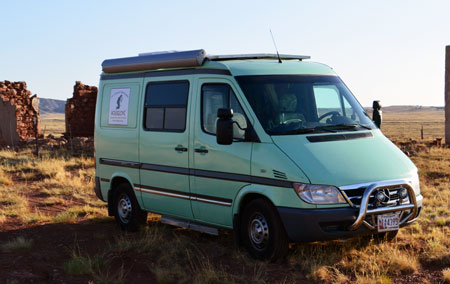
Recently they bought a used Sprinter van, and turned it into their own sweet custom Sprinter camper van. The really unique part – not only is it a conversion done on a 118″ chassis, so it’s super-compact, but it also has a one-of-a-kind retro feel to it, kind of like…a stylishly redone old house! Coincidence?
This summer was busy for Ron: he took a 40-state tour in the Houselove Sprinter camper (along with Cleo the basset hound) to promote From Animal House to Our House, his new book. I caught up with Ron to ask him some questions about his process of turning their Sprinter into a DIY Sprinter conversion.
What were your reasons for doing this conversion on a Sprinter, and a 118″ Sprinter at that?
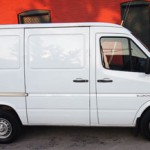
Ron: “I did a lot of research on which van to convert. I was most interested in small vehicles because mine had to fit into my garage — I live in mid-town Baltimore and have no driveway and can’t trust that a vehicle like this would be safe when parked on the streets. I was attracted to Westfalia VWs, but decided that they were too small – Jill, my wife, really wanted a toilet in the van, for example. The Sprinter was hands-down the best bet for getting the most space in the smallest package. It’s also a stylish vehicle, especially when compared to conventional vans. The 118″ fit into my garage perfectly. Also, it would be easy to maneuver in cities. So I was sold on this model.”
What were your major design goals?
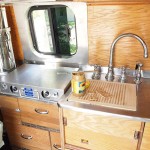
“The biggest challenge was to make the van ultra-efficient in terms of space and also aesthetically pleasing, with wood cabinets and stainless steel counters. I owned a VW van in college and had converted that to a camper, but it had many limits. Still, I liked the idea of having a van that was almost micro in size.”
Did you end up doing several designs, or just one?
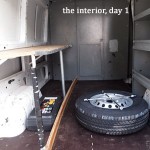
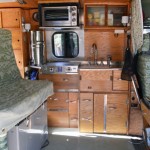
“As a design project, this was a huge challenge. At first, before I got the van, I imagined it would have much more space than it does — I was dreaming big. But then, after I got the van, I saw how small it truly is, so I had to work through several designs. The challenge was in three parts: I had to have 1) a cooktop and sink, b) enough storage for food, kitchen equipment — including a water heater, and c) a full bed.
Taking inspiration from the VW vans, I made my bed a tri-fold bench seat and put it in the back, in the usual seat position. This separated the far-back, where I would put my electrical system, from the middle of the van, which is the living area. Once the bed was in place, I had to figure out how to arrange the rest. Breakthroughs were:
- finding a small water heater that would fit under the sink;
- this opened up space in the far back for the toilet;
- by stacking two storage cabinets next to the toilet (and giving up a view through the rear door windows), I created a tremendous amount of storage space as a “garage”; then
- by building a tall, narrow storage unit (with sliding doors) over one wheel, I created a surprising amount of vertical storage for clothes.”
About how long did the conversion take you to design and build, and roughly how much did it cost?
“Total cost was close to $60K. $20K for the used 2006 van (with 60K miles on it). Biggest expense was the electrical system: solar panels, 6 AGM batteries, big inverter, breaker panels, etc. Second biggest expense was the custom paint job and body work. Third biggest expense was the water system, which included custom aluminum holding tanks, custom stainless steel counter and other fixtures. The van itself needed some mechanical work (EGR valve and shifter/transmission, which cost several thousand dollars. I replaced the shocks and stabilizer bar, got new tires.
I bought the van in July 2011. It took me 3 months to get it back from the painter (he was good but really slow and, frankly, unreliable). I didn’t start working on it myself until Nov. 2011 and finished it in May 2012. So my own work on the van, with some down time for custom tank fittings etc., lasted about 6 months.”
What are the features of the design that you feel turned out the best?
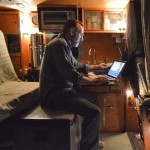
“I’m really happy with how the van interior works. When the bed is folded out, it fits snugly in the middle living area such that you are nearly level with the sink and stove-top: it creates a nestlike or treehouse atmosphere: you have access to everything in the van from that comfy spot.
I am surprised by how much storage space there is for clothes and food. For four months, I traveled fully loaded all over the country and then, when Jill joined me, I still had room for her stuff too.
I’m really pleased with the electrical system. I’ve got all the outlets and lights and extras I’ve ever wanted. And, because of multiple power sources (both solar and alternator feed), I can take this van anywhere without power worries. I consulted with a marine electrician and then an auto electrician to make sure I got everything right.”
What are the things you wish you’d done differently?
“Honestly, I wish I had taken more time with the cabinetry. It looks fine but it’s not nearly as good as it could have been. But I was under a very pressing deadline. In fact, I just barely had the van done by the time I was due on the road in May 2012. I continue to refine the interior — there are a lot of finishing touches I plan to add, like aluminum trim. And I’m still refining some extras, like my fog lights (there’s a short) and my junk drawer, which needs partitions for better organization.”
Gallery – The Houselove DIY Sprinter Conversion
 |
 |
 |
 |
 |
 |
For lots more details and videos, see the Houselove Sprinter camper page.
ASKING YOUR FEEDBACK: Could you fit all the camping equipment and storage you want in your conversion into a 118″ chassis Sprinter? Would you want to?



Comments on this entry are closed.